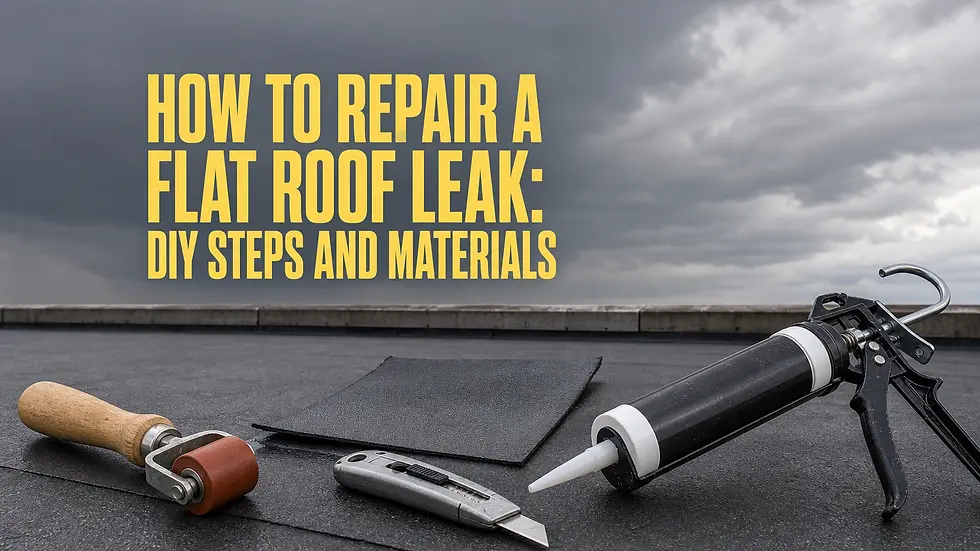
DIY Roof Repair: How to Fix Damage Yourself

A missing shingle or a fresh water stain on your ceiling rarely waits for a convenient time. You notice it after a windstorm rolls through Kirkland or during the first hard rain of fall, and suddenly you're standing in your yard wondering if you can repair the roof yourself before the damage spreads. For small, isolated problems, the answer is often yes.
This guide walks you through how to repair a roof safely, covering the exact materials and tools you need, how to spot the source of a leak, and the step-by-step process for replacing damaged shingles or flashing. We focus on the kind of repairs a reasonably handy homeowner can tackle in an afternoon, not a full roof replacement, though it helps to know when patching stops making sense and replacement takes over.
We'll also be honest about where DIY ends and professional help begins, because some damage looks minor from the ground but signals a bigger structural issue underneath. As a Kirkland-area roofing contractor, we've seen plenty of well-intentioned patch jobs go wrong. Read through each step before you climb up, and you'll know exactly when to grab a ladder and when to call in licensed roofers instead.
What to know before you start a DIY roof repair
Before you touch a ladder, take stock of what you're dealing with. Not every roof problem is a weekend project, and rushing onto a wet or steep roof causes more injuries than the leak itself ever will. Roof repair work looks simple in a YouTube video, but the person filming it usually has years of practice reading a roof surface and knowing where it's safe to step. Give yourself an honest assessment before you commit.
Safety comes first, always
Falls are the leading cause of injury in residential roofing work, and homeowners without proper gear are at the highest risk. Never work on a roof that's wet, frosted, or steeper than a 6:12 pitch unless you have real fall-protection experience. The Occupational Safety and Health Administration recommends fall protection for any work above six feet, and that guidance applies just as much to your driveway as it does to a job site. Check the OSHA fall protection guidelines if you want the full standard.
A repair that saves you $200 isn't worth an ER visit or a hospital stay.
Before you climb up, run through this checklist:
Work only in dry, calm weather with no wind gusts above 10 mph
Wear rubber-soled shoes with good tread, never sneakers or work boots with worn soles
Use a stabilized extension ladder that extends at least three feet above the roofline
Have a second person on the ground the entire time you're up there
Wear a roofing harness anchored to a secure point if your roof pitch exceeds 4:12
Skip the repair entirely if you have any balance issues, vertigo, or health conditions that affect coordination
Know what your roof is made of
Your repair approach changes completely depending on the roofing material, and using the wrong technique or product can void a manufacturer warranty or make the damage worse. Asphalt shingles are the most DIY-friendly material on this list, which is why most of this guide focuses on them. Metal, tile, and slate roofs require specialized tools and techniques that most homeowners haven't worked with before.
Roof Material | DIY Repair Difficulty | Common Issues |
|---|---|---|
Asphalt shingles | Beginner to intermediate | Missing tabs, granule loss, curling |
Wood shakes | Intermediate | Splitting, rot, moss growth |
Metal panels | Advanced | Seam separation, fastener backout |
Tile or slate | Not recommended for DIY | Cracked pieces, walking damage |
If your home has tile, slate, or a metal standing-seam roof, the safest move is to schedule a professional inspection rather than experiment. These materials break or dent under foot traffic in ways that asphalt doesn't, and one wrong step can turn a $150 repair into a $3,000 one.
Check your roof's age and warranty status
An older roof changes the math on whether DIY makes sense. If your roof is past 15 years old or nearing the end of its expected lifespan in Washington's climate, a single shingle repair might be a band-aid on a problem that's about to reappear somewhere else. Pull out any paperwork from your original installation and check whether your shingles carry a manufacturer warranty, since some warranties are voided by unauthorized repairs or non-matching materials. Kirkland's wet winters and freeze-thaw cycles in the Cascade foothills also age roofs faster than drier climates, so don't assume a 15-year-old roof here behaves like one in Arizona.
Confirm the scope of the damage
Small, contained problems are good DIY candidates: a handful of missing shingles, a small flashing gap, or a pinhole leak around a vent pipe. Widespread granule loss, sagging decking, multiple leak points, or soft spots you can feel when you walk the attic floor point to something bigger, often rotted sheathing or structural damage that needs a contractor's eyes before you patch anything on the surface.
Step 1. Inspect your roof and find the leak
Finding the actual source of a leak takes more detective work than most homeowners expect, because water travels sideways along rafters and sheathing before it drips through your ceiling, which is why tracing a leaking roof step by step matters so much. A stain in the corner of a bedroom might trace back to a flashing gap ten feet away near the chimney. Before you climb a ladder, spend twenty minutes tracing the problem methodically so you don't end up patching the wrong spot.
Start in the attic, not on the roof
Grab a flashlight and head into your attic on a dry day, ideally right after or during a rainstorm when the leak is active. Look for water stains on the underside of the roof sheathing, dark streaks along rafters, or damp insulation. Follow any staining uphill toward its highest point, since that's usually closest to where water is actually entering. Mark the spot with a piece of chalk or a small nail pushed through the sheathing so you can find it from outside later.
The leak rarely drips straight down from where it enters, so trust the attic trail more than the ceiling stain.
Look for signs from the ground first
Before you touch a ladder, walk the perimeter of your house with binoculars and scan the roofline for obvious red flags. Missing or curling shingles, dark patches where granules have worn away, and sagging sections are all visible from ground level on most one and two-story homes. Check gutters and downspouts too, since a pile of granules in the gutter often means shingles are past their useful life across a wider area than the single leak you're chasing.
Climb up and check the trouble spots
Once you know roughly where the problem lives, get on the roof and inspect the specific areas most prone to failure. This is where you confirm whether you're dealing with a simple DIY roof repair or something bigger.
Check shingles around every roof penetration: chimneys, vent pipes, and skylights
Look for cracked, curled, or missing shingle tabs
Press gently on the decking near suspected leaks to feel for soft or spongy spots
Inspect flashing seams for gaps, rust, or lifted edges
Check valleys where two roof planes meet, since debris and water pool there
Look at exposed nail heads for rust or backing out of the shingle
If you find soft decking, widespread granule loss, or more than two or three separate leak points, stop here. That's no longer a simple patch job, and pushing forward risks doing real damage to the structure underneath. For everything else, from a single missing shingle to a small flashing gap, you're ready to move on to gathering supplies and making the repair yourself.
Step 2. Gather the tools and materials you need
Running back and forth to the hardware store mid-repair is how a one-hour job turns into an all-day project, so lay everything out before you climb the ladder a second time. Most asphalt shingle repairs need the same core kit, and you likely already own half of it. Buying quality materials upfront also matters more than most homeowners expect, since a cheap tube of sealant or the wrong nail gauge is often why a patch fails again within a season.
Tools you'll gather from your garage or a hardware store
Gather these before you start, and check each item off as you load your ladder bag. Missing even one small tool, like a flat pry bar, means climbing down mid-repair and losing your rhythm.
Roofing hammer or standard claw hammer
Flat pry bar for lifting nails and old shingles
Utility knife with extra blades
Caulking gun
Chalk line for keeping new shingle rows straight
Wire brush for cleaning old sealant off flashing
Tape measure
Roofing harness and rope, if your roof pitch requires it
Materials that match your existing roof
Buying materials that actually match what's already on your roof matters more than most first-time DIYers realize. Color mismatches are one thing, but the wrong shingle profile or nail length can leave a repair vulnerable to the next storm. Take a sample shingle to the store if you're unsure, or better yet, check the manufacturer name stamped on the shingle's back if you can access an unused one from your attic stock.
A patch that doesn't match your existing shingles isn't a repair, it's a future leak with a new address.
Material | Typical Use | Notes |
|---|---|---|
Replacement shingles | Missing or damaged shingle tabs | Match brand, color, and profile |
Roofing cement or sealant | Sealing flashing edges, small cracks | Use polyurethane-based for best flexibility |
Roofing nails (1.25" galvanized) | Fastening new shingles | Avoid staples, they back out over time |
Flashing material (aluminum) | Replacing rusted or bent flashing | Sold in rolls or pre-cut pieces |
Underlayment scraps | Patching exposed decking | Only needed for larger repairs |
Organizing your kit into two piles, one for tools you already own and one for a shopping list, saves you a wasted trip. Pricing also matters here: if you're spending more than $150 in materials for what should be a small patch, that's often a sign the damage is bigger than a simple roof repair, and it's worth comparing against what a roof repair should cost and calling a licensed contractor before you buy more supplies than the job actually needs.
Step 3. Replace missing or damaged shingles
With your tools staged and matching shingles in hand, you're ready for the part most homeowners picture when they think about how to repair the roof: pulling off the damaged shingle and setting a new one in its place. This step looks intimidating from the ground, but repairing roof shingles only takes a few minutes once you know the order of operations. Rushing the nail placement is where most first-timers go wrong, so slow down and follow the sequence below rather than eyeballing it.
Remove the damaged shingle
Slide your flat pry bar under the shingle directly above the damaged one, since asphalt shingles overlap and the nails holding down the bad shingle are hidden beneath the row above it. Gently lift that upper shingle and locate the exposed nail heads, usually four per shingle, then pry each one out carefully to avoid tearing the surrounding shingles. Once the nails are out, the damaged shingle should slide free. If it's stuck to roofing cement below, work the pry bar flat against the roof deck and apply steady pressure rather than yanking, which can crack adjacent shingles.
A shingle repair only lasts if you remove every old nail, not just the shingle itself.
Install the replacement shingle
Slide the new shingle into the gap so its tabs line up with the surrounding course, matching the reveal (the visible portion) of neighboring shingles. Nail it in place using four roofing nails, positioning each one about an inch above the adhesive strip and roughly one inch in from each edge, the same placement Owens Corning's shingle installation instructions call for. Drive nails flush with the surface, never countersunk, since overdriving cracks the shingle and underdriving leaves a nail head exposed to weather.
Slide the new shingle fully into position under the row above
Align tabs with the adjacent shingle course
Drive four nails just above the sealant strip
Lift the upper shingle and press its sealant strip down over the new nail heads
Apply a small dab of roofing cement under any lifted corners
Check your work before moving on
Press down firmly across the entire repair area to confirm the new shingle sits flush with its neighbors, since a high spot or gap invites wind to lift it during the next storm. Run your hand along the seams to feel for proper adhesion, and if the sealant strip hasn't bonded yet because of cool weather, add a small bead of roofing cement under each tab corner to hold it until the sun does the rest. Kirkland's damp climate means sealant strips can take longer to activate than they would in a drier region, so don't assume a shingle is secure just because it looks right from the ground.
Step 4. Repair or replace damaged flashing
Flashing does the quiet work of keeping water out of the places where your roof changes shape, around chimneys, vent pipes, skylights, and valleys. When it rusts, cracks, or lifts away from the surface, water finds that gap fast, and it usually shows up as a leak nowhere near the actual flashing itself. Fixing flashing is less about hammering and more about careful removal and resealing, so patience matters more here than muscle.
Identify which type of flashing you're dealing with
Before you pull anything apart, figure out what kind of flashing failed, since the way flashing gets installed and repaired changes with each type. Step flashing runs along roof-to-wall intersections in small overlapping pieces, while continuous flashing covers longer runs like valleys in one strip. Vent pipe flashing usually has a rubber or plastic collar that dries out and cracks with age long before the metal underneath fails.
Flashing Type | Common Location | Typical Failure |
|---|---|---|
Step flashing | Roof-to-wall joints | Rust, lifted edges |
Valley flashing | Where two roof planes meet | Corrosion, debris wear |
Vent pipe collar | Around plumbing vents | Cracked rubber boot |
Chimney flashing | Base of chimney | Separated seams, caulk failure |
Remove and replace damaged sections
Once you've identified the failure point, pry up the shingles overlapping the flashing with your flat bar, working slowly to avoid tearing the surrounding material. Remove the nails holding the old flashing, lift it free, and clean the area of old caulk or roofing cement with a wire brush. Cut new aluminum flashing to match the old piece's dimensions, slide it into place under the shingle course above, and nail it along the top edge only, never through the exposed face where water runs.
Nail through the face of flashing and you've just created the next leak.
For vent pipe collars, you don't need to touch the metal base at all if it's still solid. Just cut away the cracked rubber boot, slide a new one down over the pipe, and seal the top edge where it meets the pipe with a bead of roofing cement.
Seal every edge and seam
Apply a generous but even bead of polyurethane roofing cement along the top and side edges of the new flashing, pressing the overlapping shingle back down into it. Smooth the cement with a putty knife so it forms a clean seal rather than a visible glob, since ridges and gaps in the cement collect water instead of shedding it. Check the seal again in 24 hours once it's cured, pressing firmly on the edges to confirm nothing has lifted before you move on to smaller cracks and holes elsewhere on the roof.
Step 5. Seal cracks, holes, and small leaks
Not every roof problem needs a full shingle swap or flashing job. Small punctures from a fallen branch, hairline cracks along a ridge cap, or a pinhole where a nail backed out years ago all respond well to careful sealant work. This step rounds out most of what it takes to repair the roof on your own, since it covers the odds and ends that don't fit neatly into the shingle or flashing categories above.
Match the sealant to the type of damage
Grabbing whatever tube of caulk is sitting in your garage is how a lot of DIY seals fail within a season. Roofing sealant comes in several formulas, and picking the wrong one for the surface or exposure level means redoing the work by spring.
Sealant Type | Best For | Notes |
|---|---|---|
Polyurethane roofing cement | Cracks, flashing edges | Flexible, weatherproof, most versatile |
Butyl rubber sealant | Metal-to-metal joints | Strong adhesion, less flexible in cold |
Asphalt roofing cement | Shingle repairs, small holes | Matches asphalt shingles well |
Silicone sealant | Skylight and vent seams | Avoid on shingles, doesn't accept paint |
Always check that your chosen sealant is rated for exterior use and can handle the temperature swings a Kirkland roof sees between winter frost and summer sun.
Apply sealant to hairline cracks and pinholes
Clean the damaged area first with a wire brush to remove loose granules, dirt, or old caulk, since sealant won't bond properly to a dirty surface. Load your caulking gun and apply a thin, even bead directly over the crack or hole, extending about half an inch past each edge of the damage.
Clean and dry the area completely before applying anything
Apply a bead of sealant directly over the crack or pinhole
Smooth it with a putty knife so it sits flush, not mounded
Feather the edges so water sheds off instead of pooling
Let it cure fully before checking with a hose test
A thick glob of sealant traps water just as easily as it keeps it out, so smooth it flat.
Patch holes larger than a quarter
Holes bigger than a quarter, often from storm debris or old antenna mounts, need more than caulk alone. Cut a patch from spare flashing material or a scrap of the same shingle, size it to overlap the hole by at least two inches on every side, and set it into a full bed of roofing cement before pressing it firmly into place. Cover the patch edges with another layer of cement, feathering it out so it blends with the surrounding surface rather than sitting as a raised lump that catches wind and debris. Let everything cure for a full day before you move on to cleanup and testing.
Step 6. Clean up and test your repair
Finishing the physical repair is only half the job, since a sloppy cleanup can undo the good work you just did. Loose nails, shingle scraps, and granules left on the roof surface wash into gutters and downspouts, where they clog drainage and create a new problem within a season. Gather everything into a bucket as you work rather than leaving it for a final sweep, and check nearby gutters for debris that fell during the repair.
Clear debris and check your work area
Sweep the repaired section and the surrounding roof plane with a stiff broom, paying close attention to valleys and gutter lines where loose granules and nail fragments tend to collect. Inspect the ground below your work area too, since dropped nails on a driveway or lawn are a hazard for feet, tires, and lawnmower blades alike. Walk the perimeter one more time with a magnetic nail sweeper if you have one, a cheap tool that saves you from a flat tire weeks later.
Run a hose test before you call it done
Don't trust a repair until you've tested it under real water pressure, ideally with a helper in the attic watching for drips while you run a garden hose over the patched area. Start at the bottom of the repair and work upward, mimicking how rain actually flows across a roof, and hold the hose in each spot for a full two minutes before moving on.
If you skip the hose test, you won't know your repair worked until the next storm proves you wrong.
Run through this checklist before you consider the job finished:
Spray the lowest edge of the repair first, then move upward in stages
Hold water on flashing seams and nail heads for at least two minutes each
Have someone in the attic with a flashlight watching for new moisture
Check the original leak point specifically, not just the repaired shingle
Wait 24 hours and inspect the attic again after the test dries
Document the repair for future reference
Photograph the finished repair from a few angles before you climb down, including a wide shot showing its location relative to a chimney, vent, or roof edge. These photos help you track the repair's condition over future seasons and give a roofer useful context if you ever need a professional opinion on nearby damage. Keeping a simple log with the date, materials used, and photos also matters if you ever sell the house, since buyers and inspectors appreciate a documented repair history over a mystery patch. Once the hose test passes and your photos are saved, your DIY fix to repair a roof leak is genuinely complete, not just cosmetically finished.
How to prevent future roof damage
Fixing today's leak doesn't mean you're done with roof maintenance for good. Most of the damage homeowners repair a roof for started small and went unnoticed for months, sometimes years, before it showed up as a stain on the ceiling. Building a few habits into your yearly routine catches problems while they're still a five-minute fix instead of a weekend project.
Schedule seasonal inspections
Twice-a-year checkups, once in spring and once in fall, catch the kind of wear that adds up quietly between storms, and a simple roof maintenance checklist for Washington homes keeps you from missing anything. Walk the roofline with binoculars, check the attic for fresh staining, and look at flashing around chimneys and vents for lifted edges. Kirkland's wet winters put extra stress on shingles and sealant, so a fall inspection before the rainy season starts matters more here than in drier climates.
The homeowners who never need an emergency roof repair are usually the ones who inspect twice a year, not the ones who get lucky.
Keep gutters and downspouts clear
Clogged gutters send water backing up under your shingles instead of off the roof, which rots decking and rusts flashing from underneath where you can't see it. Clean gutters at least twice a year, more often if you have overhanging trees, check that downspouts direct water at least three feet away from your foundation, and consider whether gutter guards actually help with moss and PNW rain.
Clean gutters every spring and fall, plus after major storms
Check for sagging gutter sections that pool water
Confirm downspouts aren't clogged or disconnected
Look for granules collecting in gutter troughs, a sign shingles are wearing down
Trim back trees and remove debris
Overhanging branches scrape granules off shingles every time the wind blows, and a heavy limb can crack a shingle or puncture the deck outright during a storm. Cut back branches so they clear the roofline by at least six feet, and clear off leaves, needles, and moss that trap moisture against the surface. Moss in particular works its way under shingle tabs and lifts them over time, which is a common source of the small leaks covered earlier in this guide.
Fix small problems the moment you spot them
A single lifted shingle or a hairline crack in caulk rarely stays small for long once water starts working its way in underneath. Waiting until spring to deal with a fall problem gives an entire wet season for minor damage to spread into rotted decking or a bigger leak. Treat every small find as its own quick repair rather than adding it to a mental list, and you'll rarely face the kind of widespread damage that turns into a full roof replacement years earlier than it should.
When to call a professional roofer instead
Every DIY guide has a limit, and roof repair hits that limit faster than most home projects, so it pays to know where a leaking roof stops being a DIY job. Some damage looks like a simple patch from the ground but actually points to a structural or safety issue that needs a trained eye and the right equipment. Knowing when to stop climbing and start dialing saves you from turning a $200 repair into a five-figure rebuild.
Signs the damage is bigger than a patch
Certain warning signs mean you should set down the pry bar and pick up the phone instead. Structural damage hides easily under a few intact shingles, and pushing forward without checking the decking underneath can mask a much larger problem until it caves.
Soft, spongy, or sagging decking anywhere on the roof
More than three separate leak points found during your inspection
Visible daylight through the roof deck from inside the attic
Widespread granule loss across multiple roof sections, not just one spot
Roof age past 20 years combined with any active leak
Damage near a chimney, skylight, or multiple valleys at once
If you find more than one problem hiding under the first shingle you lift, stop and call a roofer.
When your roof material rules out DIY
Material matters as much as the damage itself. Tile, slate, and standing-seam metal roofs punish foot traffic in ways asphalt never does, and a cracked tile or dented panel from an inexperienced repair often costs more to fix than the original leak. If your home has any of these materials, or a wood shake roof showing rot rather than a single split shake, treat the repair as a job for professional roof repair in Kirkland, WA from the start rather than a test run.
When your own limits are the real issue
Being honest about your comfort level matters just as much as reading the roof correctly. A steep pitch, a second-story roofline, bad weather timing, or simply not having a second person around to spot you are all valid reasons to call a professional instead of pushing through alone. Roofing work rewards experience, and a contractor who does this daily spots failure points in minutes that would take a homeowner an entire afternoon to find, if they find them at all.
Get a locked-in quote before small damage grows
Waiting on a questionable repair rarely saves money, since minor roof damage tends to expand quietly behind the scenes while you decide what to do. Legacy Exteriors offers a locked-in price quote for Kirkland-area homeowners, so you know the full cost upfront before any work begins, with no surprises once the job is underway. A quick inspection from our team costs you nothing and tells you exactly whether you're looking at a simple fix or something that needs professional attention, so send us your details to set one up.
Keeping your roof watertight for years to come
Most homeowners can handle a DIY roof repair when the damage stays small: a few missing shingles, a cracked seal, a minor flashing gap. The steps in this guide cover the vast majority of leaks that show up after a Kirkland storm, and following them in order keeps you from turning a quick fix into a bigger problem. What separates a repair that lasts from one that fails by next season usually comes down to patience: matching materials correctly, sealing every edge, and testing your work before you call it done.
But some damage isn't a weekend project, no matter how confident you feel on the ladder. If your inspection turned up soft decking, multiple leak points, or a roof material that punishes mistakes, don't guess. Book a free roof inspection with our Kirkland team and get a clear answer, and a locked-in price, before the next rain finds its way back inside.