


The Process of Installing House Siding: A Step-by-Step Guide

When it comes to protecting and beautifying your home in the Seattle area, installing house siding is one of the smartest investments you can make. Whether you live in Kirkland, Bellevue, Bothell, or nearby communities, quality siding shields your home from the elements, improves energy efficiency, and boosts curb appeal. Today, I want to walk you through the entire process of vinyl siding installation so you know exactly what to expect when upgrading your home’s exterior.
Understanding the Basics of Installing House Siding
Before diving into the installation steps, it’s important to understand what installing house siding involves. Siding is the outer layer of your home’s walls, designed to protect against rain, wind, and temperature changes. Vinyl siding is a popular choice in the Seattle region because it’s durable, low-maintenance, and resistant to moisture - a key factor given our rainy climate.
The process starts with preparing the surface, then attaching the siding panels securely while ensuring proper alignment and ventilation. Each step requires attention to detail to guarantee a long-lasting, attractive finish.

Step 1: Preparing Your Home for Siding Installation
Preparation is critical for a successful siding project. First, the existing siding or exterior cladding must be inspected and removed if necessary. This allows us to check the underlying structure for any damage such as rot or mold, which must be repaired before proceeding.
Next, a weather-resistant barrier is installed over the sheathing. This barrier acts as an extra shield against moisture infiltration, which is especially important in the Pacific Northwest’s wet climate. We also install flashing around windows, doors, and corners to direct water away from vulnerable areas.
Proper preparation ensures your new siding will perform well and last for decades.
Step 2: Installing the Vinyl Siding Panels
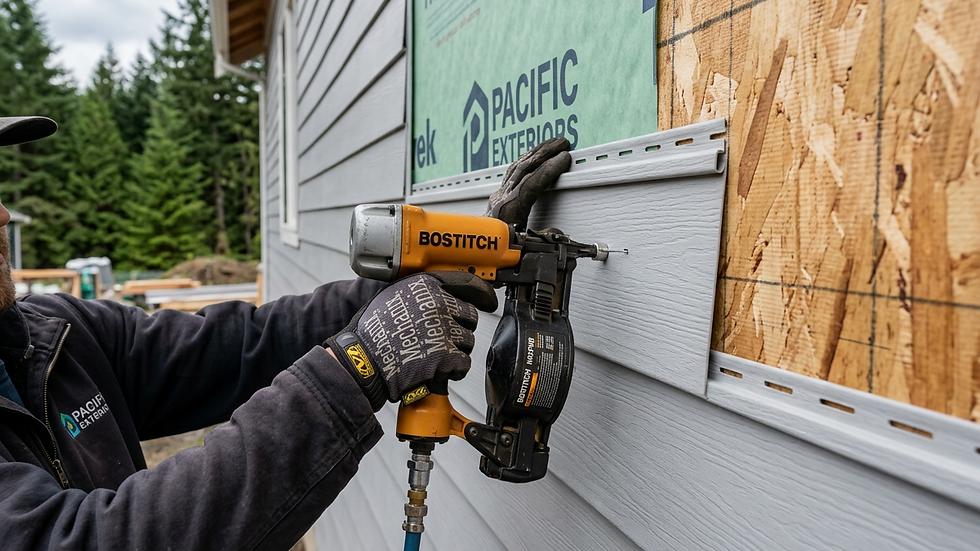
Once the surface is ready, the actual siding installation begins. We start by attaching starter strips along the bottom edge of the walls to provide a secure base for the first row of siding panels. Then, the vinyl panels are installed from the bottom up, overlapping each row to create a tight seal.
It’s important to leave a small gap for expansion and contraction since vinyl expands in heat and contracts in cold. We use nails placed in the center of the nailing slots to allow the siding to move slightly without buckling.
Corners and trim pieces are installed last to give the siding a clean, finished look. These details not only enhance aesthetics but also improve weather resistance.
How much does it cost to install vinyl siding per square foot?
Understanding the cost of vinyl siding installation helps you budget effectively. In the Seattle area, prices typically range from $5 to $10 per square foot, depending on factors such as:
Quality and style of vinyl siding chosen
Complexity of your home’s architecture
Removal of old siding or repairs needed
Labor rates in your local market
For example, a straightforward installation on a simple rectangular home will be on the lower end of the scale. However, if your home has many corners, windows, or requires repairs, costs can increase.
Keep in mind that investing in quality materials and professional installation pays off in durability and energy savings over time.
Step 4: Final Inspection and Cleanup
After all siding panels and trim are installed, a thorough inspection is essential. We check for any loose panels, gaps, or misaligned pieces that could compromise the siding’s performance. Proper sealing around windows and doors is verified to prevent water intrusion.
Cleanup is also part of the process. We remove all debris, old materials, and tools from your property, leaving your home looking neat and refreshed.
This final step ensures your siding installation meets high standards and your home is protected for years to come.
Why Choose Professional Installation in the Seattle Area?
While some homeowners consider DIY siding installation, professional expertise makes a significant difference. Our knowledge of local weather conditions, building codes, and best practices ensures your siding is installed correctly the first time.
We prioritize transparency and quality workmanship, so you feel confident throughout the project. Plus, we understand the unique needs of homes in Kirkland, Bellevue, Bothell, and surrounding communities, tailoring solutions that fit your home’s style and environment.
If you’re ready to enhance your home’s exterior with vinyl siding, don’t hesitate to reach out for a consultation. We’re here to help you protect your investment with expert care.
By understanding the process of installing house siding, you can make informed decisions and enjoy the benefits of a beautiful, durable exterior. From preparation to final inspection, each step plays a vital role in the success of your project. Remember, professional vinyl siding installation combines quality materials with skilled craftsmanship to deliver lasting value for your home in the Seattle area.


